User account
General
A charge will immediately appear on your bank statement under the name "Sheridan".
In accordance with applicable law, we collect tax in all states. Sales tax is applied to the total amount of the order and is based on the shipment's destination state and local sales tax rates. Applicable sales tax is charged for electronically delivered products where required by local law. These items are considered to be "shipped" to the address that your order was billed to.
After logging in, click on My Account. Click on the edit tab (upper right, under My Account). Type your new password into the "password" and "confirm password" fields and save. After logging in, you may also change your password here.
Please use our Contact Us form for all technical-related questions. A representative will respond to your question within 24-48 business hours.
Click on the "Login" link on the top right of the home page to get to the login screen. Type your credentials into the username and password fields and click the "Login" button to access your account. You may also log in here.
Please confirm all purchases before you complete them as we are unable to provide refunds for digital content. If you need assistance with your purchase contact us using our Contact Us form.
Online eBooks
Our online reader provides a consistent design and experience across all browsers and devices, allowing you to focus on your eBook instead of learning the platform or downloading software.
Our online reader allows you to access your materials on any Internet-enabled device including tablets, smartphones, desktops, and laptops. Offline access is available, but no downloads are required!
No, you can only view your content on one device at a time because this file type is protected.
Yes, 100% of the eBook can be read offline for up to 10 days at a time. For instructions to read your purchased eBook offline, visit the FAQ How do I access Offline mode?
Note: You must have an Internet connection to activate Offline mode. Clearing your browser cache may disrupt the Offline functionality.
Step 1: Log in and navigate to your My eLibrary to select the eBook you would like to view in Offline mode. Select ‘Read Now’ to open your eBook.
Step 2: Once inside your eBook, in the upper left-hand corner to expand menu and select ‘Offline’.
Step 3: Turn the Offline mode to ‘On’ for selected pages.
Step 4: Select ‘Download’.
Step 5: You can add the page’s web address as a bookmark or Favorite in your browser for quick access to your content later while offline.
Step 1: Log in and select the eBook you would like to print from your My eLibrary. Select ‘Read now’.
Step 2: Once inside your eBook, in the upper left-hand corner to expand menu and select ‘Print’.
Step 3: Select ‘Create New Print’.
Step 4: Select page numbers and click ‘Add Page Range’.
Step 5: The page(s) you are requesting to print will appear below. Confirm your print selection and select ‘Continue’ to proceed with printing.
Step 6: Select ‘Download’ to print the pages you selected.
Click and hold down the left mouse button, then drag the pointer over the word(s) you would like to highlight or annotate. To delete a highlight or note, click on the annotation you would like to delete and select the trash can icon.
Step 1: To enable this feature, select the ‘Navigation’ icon in the upper left-hand corner of the screen and click into ‘Collaboration’.
Step 2: To join a group, enter the unique 8-digit access code for that group and select ‘Join’.
When joining the session, your notes and highlights will be temporarily removed and the group creator’s notes and highlights will appear in your eBook. Select ‘Exit Session’ to view your notes and annotations again. You can return back to the group creator’s annotations at any time, so long as they keep their group enabled!
Step 1: Select the ‘Navigation’ icon in the upper left-hand corner of the screen and select ‘Collaboration’.
Step 2: Select ‘Create a New Group’ and complete the fields.
Step 3: Share the 8-digit code with others to allow them to join your group and share your notes and highlights. Group members can switch back and forth between your shared notes, and their own!
For real-time collaboration you must join a session. Within ‘Groups you Manage’ you can locate the unique access code, join the session for real-time collaboration, remove users, or delete your group.
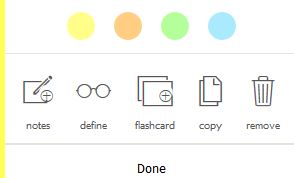
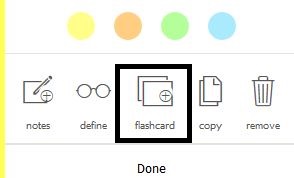
Option 1: To create a flashcard from text within the eBook, click and hold down the left mouse button, then drag the pointer over the word(s) and select the ‘flashcard’ icon in the tool box that appears.
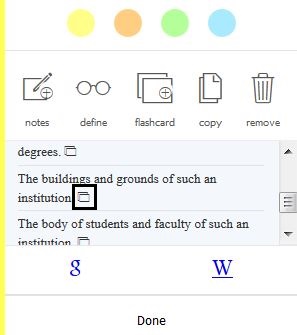
Option 2: To create a flashcard from the definition of a word, highlight the word and select the ‘Define’ icon (looks like a pair of glasses). Click the rectangular Flashcard icon next to the definition to create the flashcard. Create a new flashcard deck, or add the flashcard to an existing deck.
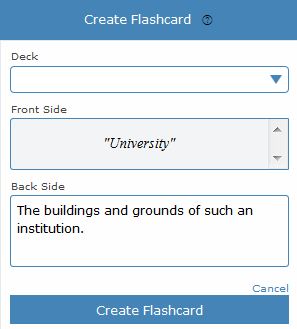
To create flashcard:
1. Select down arrow and search for or create a deck name
2. Edit definition (Back Side) if desired, then click Create Flashcard
Step 1: Locate your flashcards by selecting the ‘Navigation’ icon (looks like three lines) in the upper left-hand corner of the screen and select ‘Study Flashcards’.
Step 2: Flashcards are automatically organized by chapter and the custom deck names you’ve created. Select ‘Study by Chapter’ or ‘Study by Deck’ to proceed to studying your flashcards.
Step 3: Select ‘All’ or the individual sections you wish to study flashcards for and select the ‘Start Flashcards’ button.
Step 4: As you study flashcards, use the arrow buttons on the side of each large flashcard to jump to the next or previous card. To view the other side, click directly on the flashcard.
All of your annotations including highlights, flashcards, and notes will automatically be added to your study guide.
Step 1: Select the ‘Navigation’ icon in the upper left-hand corner of your screen and select ‘Study Guides’.
Step 2: Organize your study guide by section or colors, or ‘Select All’. Then, select ‘Open Study Guide’ to view your automatic study guide.
*Click on any of your notes and select ‘View in Book’ to jump directly to that page!